This notebook contains an excerpt from the Python Programming and Numerical Methods - A Guide for Engineers and Scientists, the content is also available at Berkeley Python Numerical Methods.
The copyright of the book belongs to Elsevier. We also have this interactive book online for a better learning experience. The code is released under the MIT license. If you find this content useful, please consider supporting the work on Elsevier or Amazon!
< 1.0 Python Basics | Contents | 1.2 Python as A Calculator >
Appendix A. Getting Started with Python on Windows
Set up working environment on windows
Before we start to use Python, we need to set up our Python working environment on the computer. In this section, we will introduce the processes to get it started.
There are different ways to install Python and related packages, here we recommend to use Anaconda or Miniconda to install and manage your packages. Depending on the operating systems (OS) you are using, i.e Windows, Mac OS X, or Linux, you need to download a specific installer for your machine. Both Anaconda and Miniconda are aiming to provide easy ways to manage Python work environment in scientific computing and data sciences.
Here we will use Windows as an example to show you the install processes. For Mac and Linux users, please read chapter 1.1 for all the processes. The main differences between Anaconda and Miniconda are:
Anaconda is a complete distribution framework that includes the Python interpreter, package manager as well as the commonly used packages in scientific computing.
Miniconda is a light version of Anaconda that does not include the common packages, therefore, you need to install all the different packages by yourself. But it does have the Python interpreter and package manager.
The option we choose here is to use Miniconda to manage our installation of the packages. This way we can only install the ones we need.
The Miniconda install process is described below:
Step 1: Download the Miniconda installer from the website
Here you can choose a different installer based on your OS. We choose the windows installer and Python 3.7 as an example.
Step 2: Run the installer by double click the installer:
After you run the installer, follow the guide and you will successfully install it.
One thing to note is that you can change the installation location by giving it an alternative location on your machine, we will use the default path here.
After installation, we can open the anaconda prompt (the equivalent terminal on Mac or Linux) from the start menue.

Then we can check whether installation is success or not by typing the following commands:
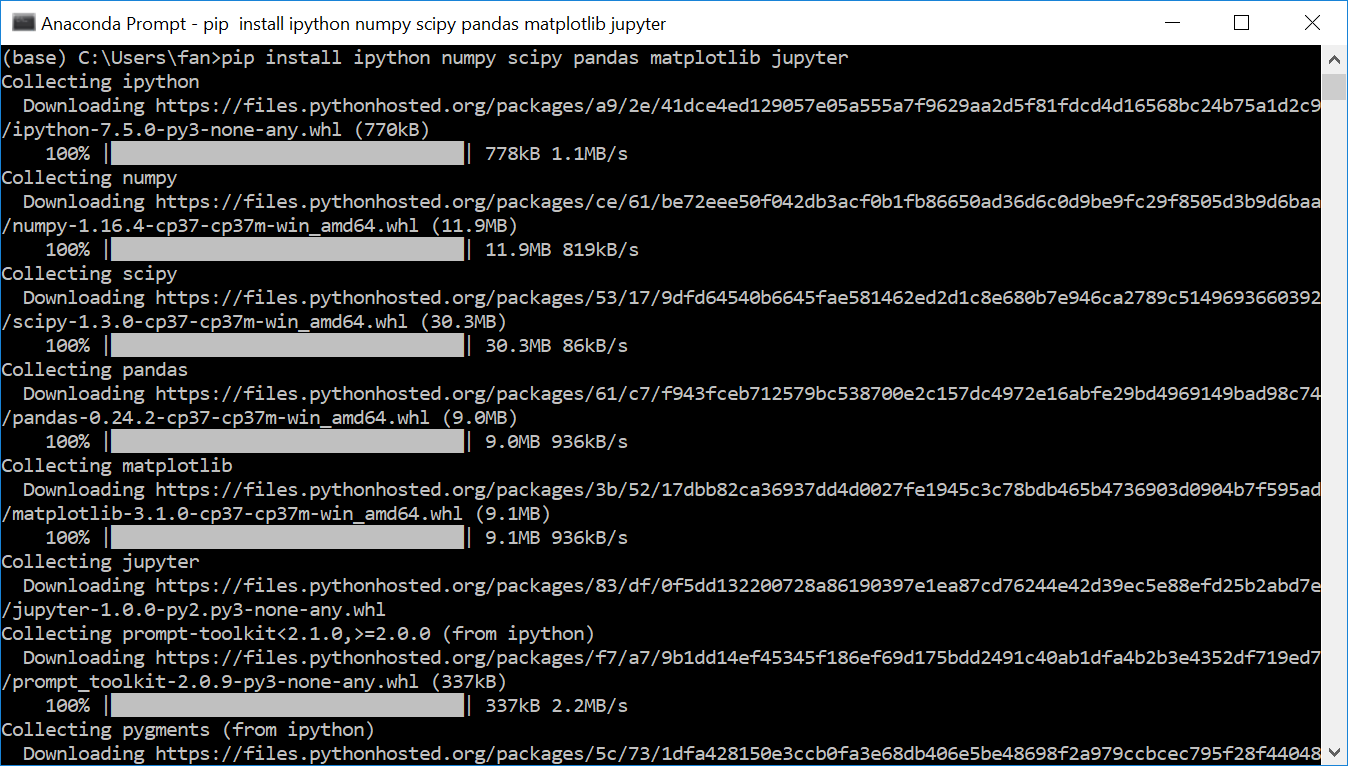
Step 3: Install the basic packages that used in this book
Let us first install some packages for our book - ipython, numpy, scipy, pandas, matplotlib and jupyter notebook. We will talk more about the management of the packages using pip and conda later.

Three ways to run Python code
There are different ways to run Python code, they all have different usages. In this section, we will quickly introduce the three different ways to get you started.
Using Python shell or Ipython shell
The easiest way to run Python code is through the Python shell or Ipython Shell (which stands for Interactive Python). The Ipython shell is richer than Python shell, such as Tab autocompletion, color-highlighted error messages, basic UNIX shell integration and so on. Since we just installed Ipython, let us try to run the “hello world” example with it. The way we launch either Python or Ipython shell is by typing it in a terminal (see the figure below). Then we can run Python command by typing it into the shell, by pressing Enter, we immediately see the results from the command. For example, we can print out “Hello World” by typing print("Hello World"):

In the above command, the print() is a function in Python, and “Hello World” is a string data type that we will introduce them later in the book.
Run Python script/file from command line
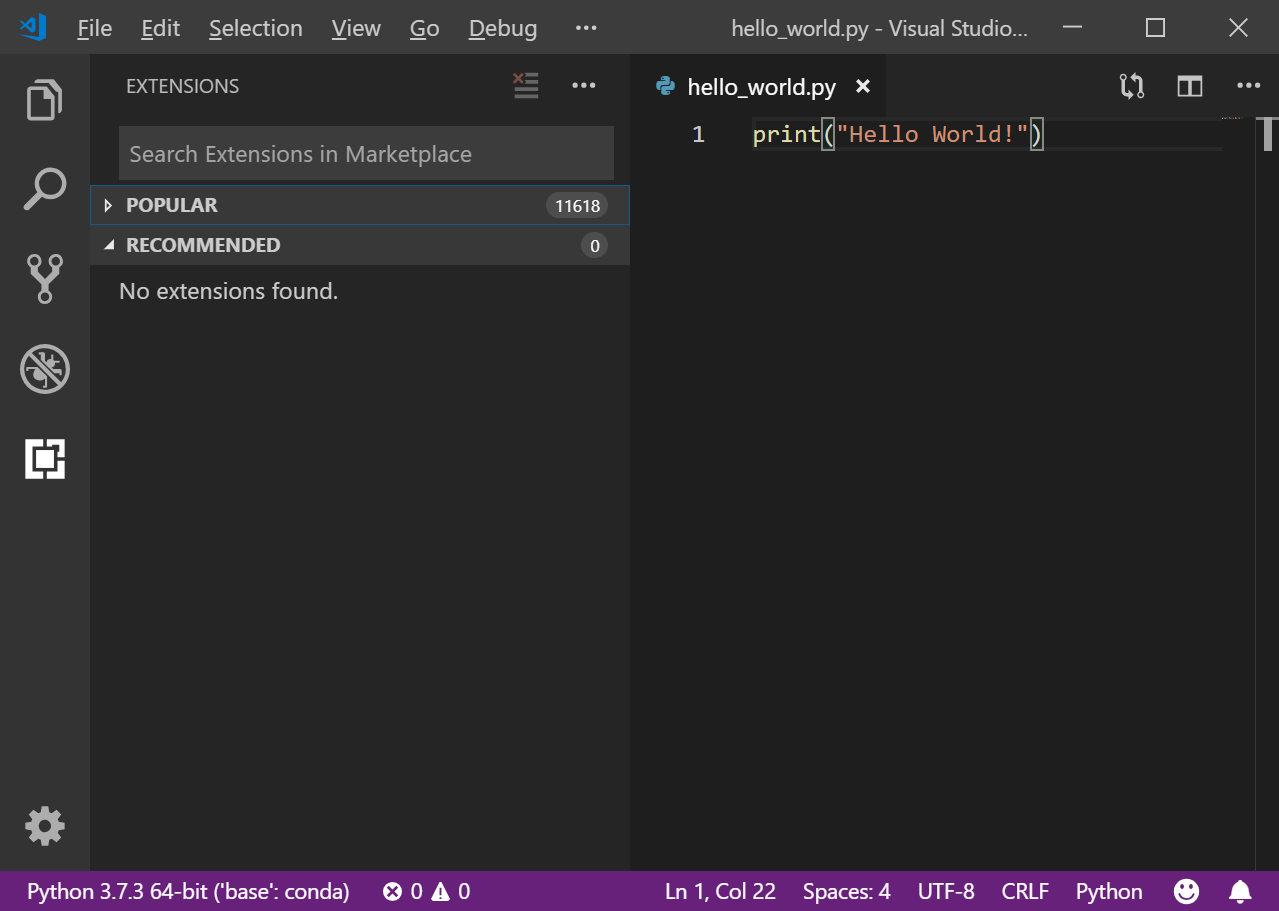
The second way to run Python code is to put all the commands into a file and save it as a file with extension .py (the extension of the file could be anything, but by convention, it is usually .py). For example, use your favorite text editor (Showing here is the Visual Studio Code), put the command in a file called hello_world.py:

Then just run it from terminal:

Using Jupyter Notebook
The third way to run Python is through Jupyter notebook. It is a very powerful browser-based Python environment, we will talk more about it in details later in this chapter. Here we just quickly see how we could run the code from a Jupyter notebook. Run the jupyter notebook in the bash command line:
jupyter notebook
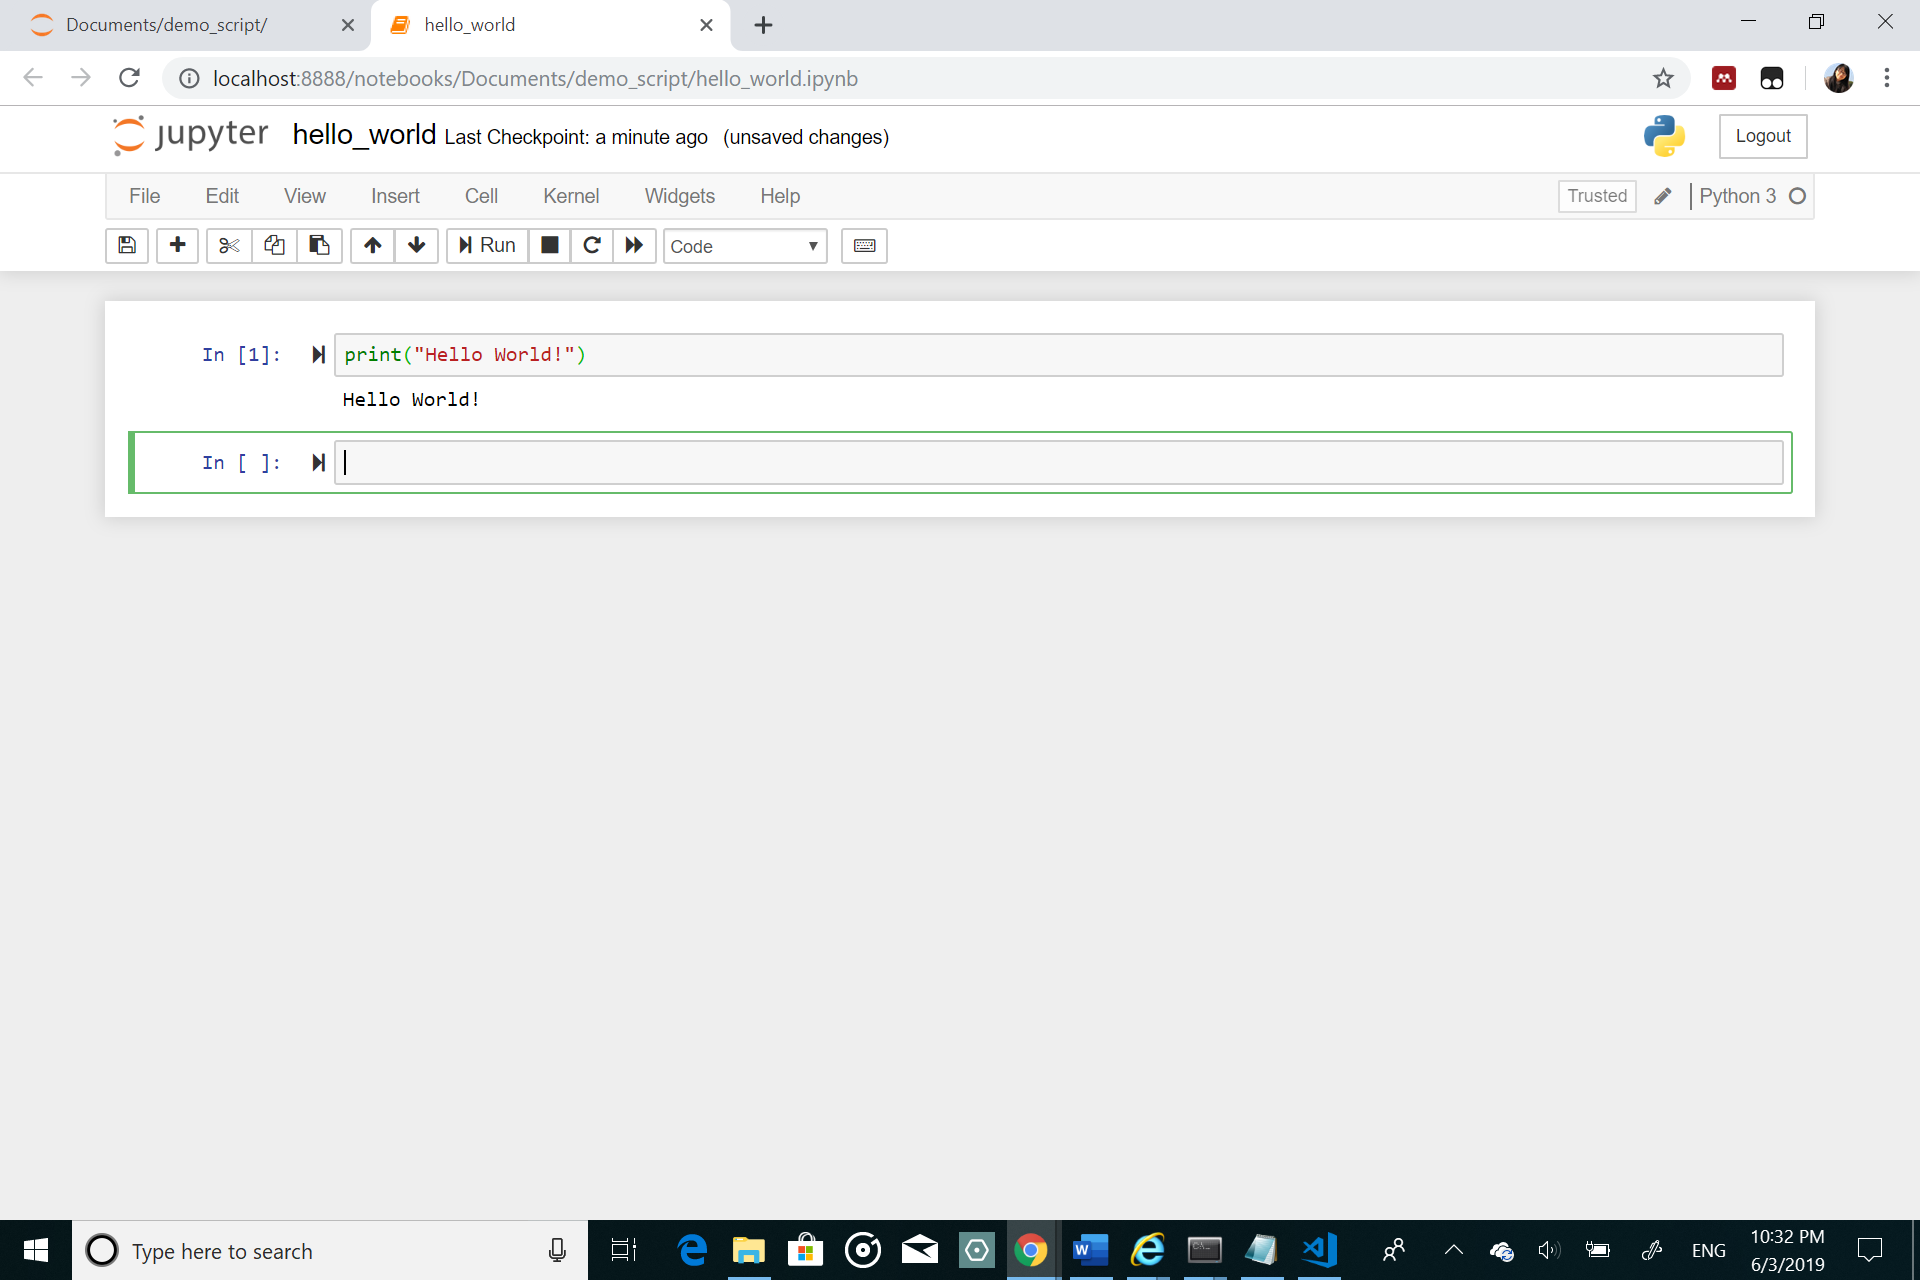
Then you will see a local web page will pop up, from the upper right button to create a new Python3 notebook:

Running code in Jupyter notebook is easy, you type your code in the cell, and press shift + enter to run the cell, the results will be shown below the code.

The Zen of Python
Ok, in the previous section, we learned about how to set up our working environment and run Python in different ways. Let’s end this section by seeing the famous ‘The Zen of Python’ with running the following command in one of the 3 ways. You may not understand the outputs now, but with time, I am sure you will find how useful it is.
import this
The Zen of Python, by Tim Peters

Beautiful is better than ugly.
Explicit is better than implicit.
Simple is better than complex.
Complex is better than complicated.
Flat is better than nested.
Sparse is better than dense.
Readability counts.
Special cases aren't special enough to break the rules.
Although practicality beats purity.
Errors should never pass silently.
Unless explicitly silenced.
In the face of ambiguity, refuse the temptation to guess.
There should be one-- and preferably only one --obvious way to do it.
Although that way may not be obvious at first unless you're Dutch.
Now is better than never.
Although never is often better than *right* now.
If the implementation is hard to explain, it's a bad idea.
If the implementation is easy to explain, it may be a good idea.
Namespaces are one honking great idea -- let's do more of those!
< 1.0 Python Basics | Contents | 1.2 Python as A Calculator >
